I have been pretty lucky in the eyebrow department, and have always managed to maintain them myself. I have had them professionally done twice in my whole life, but only as a treat or as part of a gift package. Luckily I do not have any horror stories about at-home eyebrow grooming, so I thought that I would share my method with you. I do have a lot of blonde hair in my brows, which is definitely a blessing and a curse. A blessing because a lot of the hair is very fine and nearly invisible, a curse because the fine little white blonde hairs are IMPOSSIBLE to pluck. They are just so hard to see and nearly impossible to grasp with the tweezers. Aside from that, I think that I have developed a pretty good system for keeping my brows in check.
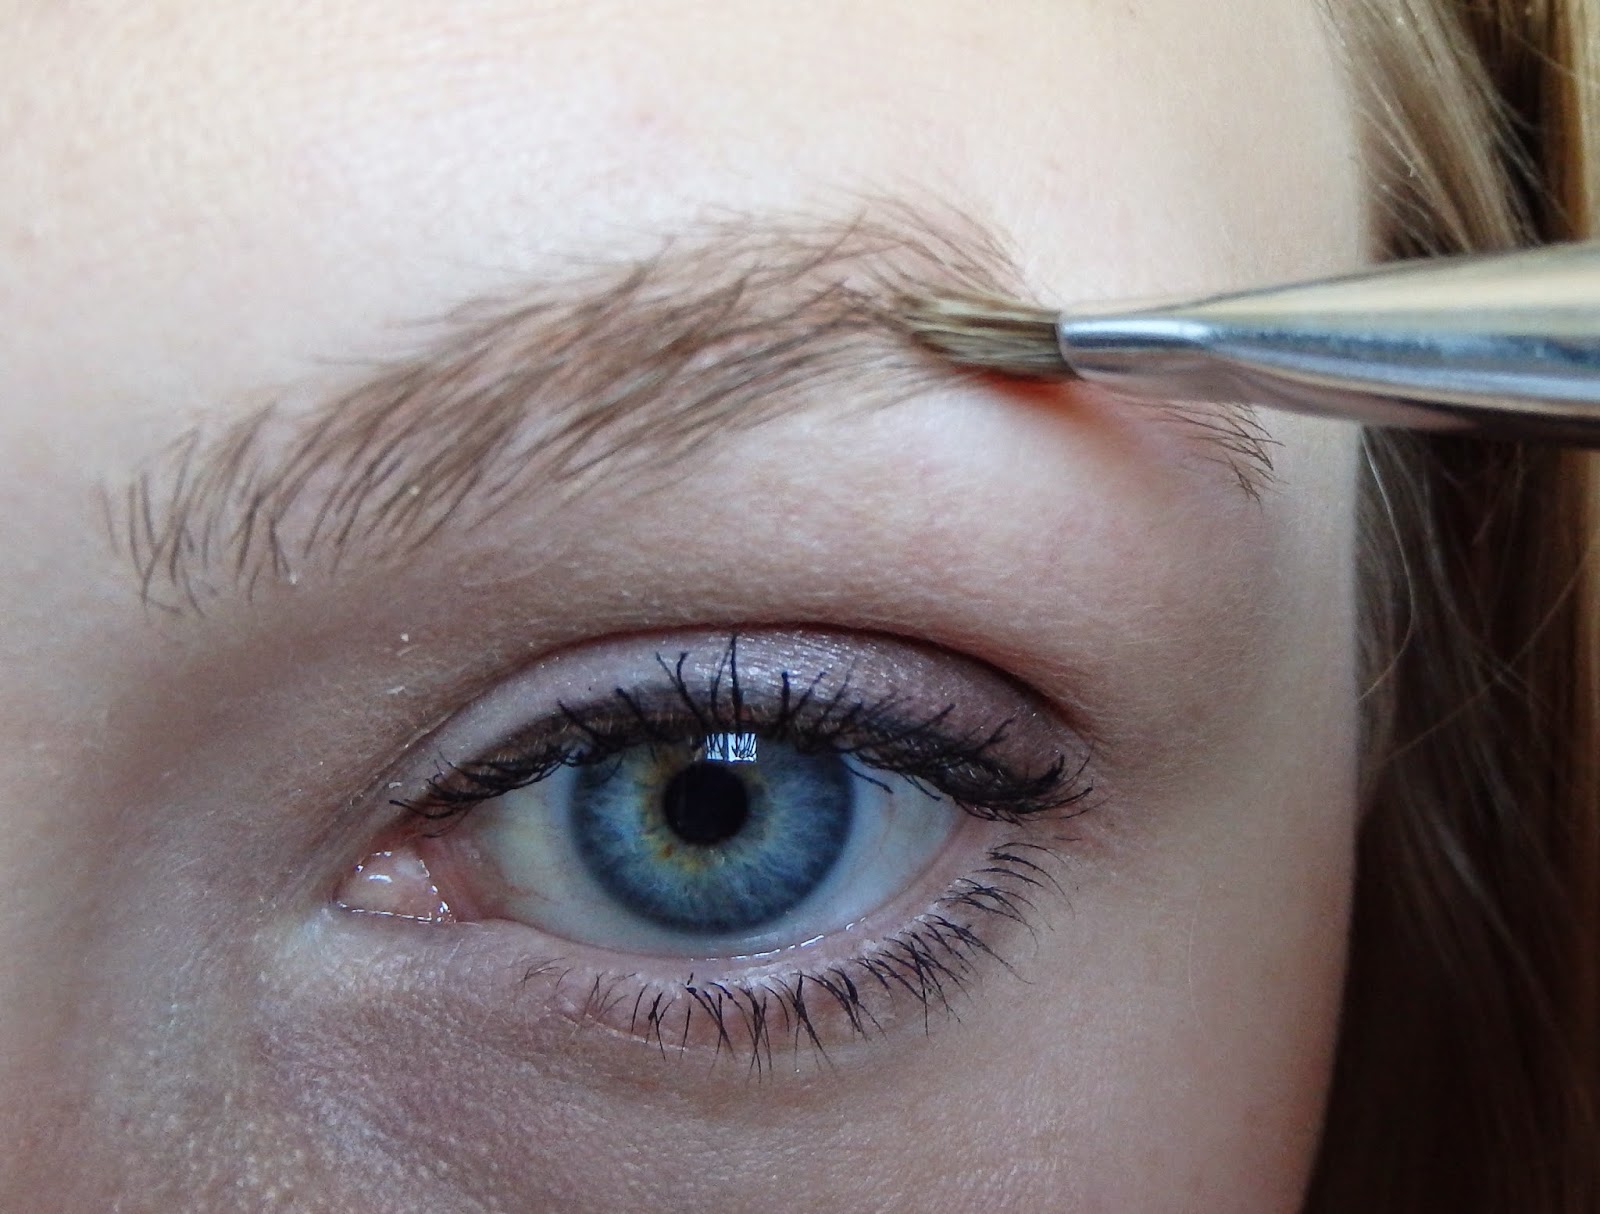
This is how I start out. I have a pretty good natural shape, I just like to clean up around the edges and trim the hairs to be shorter to keep them from becoming unruly.
Next I like to use a
spoolie brush to brush all of the hairs straight up. This allows you to trim the hairs easily. It may require a lot of brushing to move your eyebrows away from their natural path but this step is really necessary if you want to trim the excess length.
When it comes to the actual trimming, I use a set of cosmetic scissors that I received in a travel kit several years ago. I never really used them for anything until one day I realized that they were perfect for my eyebrows. Any small pair of scissors will work. When you are actually cutting, make sure to go slowly and to take a step back and make sure that you are not cutting into your shape. I like to just trim the hairs that stick up over the edge of the brow when combed up.
As you can see, trimming gives the brow a much more defined shape and will prevent them from becoming messy throughout the day.
After trimming I go in with my tweezers. I don't like to tweeze too close to the actual brow, I just like to stick to the area below and right at the tail of my brows. Again, make sure to take a step back every now and then to make sure that you aren't over-plucking. Try to work on one brow at a time. Obviously they should have the same basic shape, but each brow can be different and you may ruin your shape if you try too hard to make it match the other.
Next I like to take care of some of those pesky blonde hairs that I have. These hairs are nearly invisible, however they can catch the light and makeup will cling to them, which can quickly ruin a look. I like to use the
Sally Hansen Wax Strip Kit. It comes with pre-waxed strips that are perfect for my brows. I have never tried them anywhere else on the body, so the box lasts for a very long time. There are differently sized strips, but they can easily be cut down to the shape you want.
You simply warm the strip between your hands and then peel it apart and apply to your skin. Be sure to rub it in the direction of hair growth and then while keeping skin taut, quickly pull the strip off in the opposite direction. I am able to use each side of the strip after I peel it apart. These strips are very easy to use, and help me to remove the little blonde fuzzy hairs that I get around my brows to keep them looking clean and defined.
(I do have a natural dent in my brow shape near the arch on my left brow, which is shown here, and hair does not really grow there. I typically fill this area in when I apply my makeup)
I use the strips between my brows, and then along the top edge and at the very end of my brow. I am EXTREMELY careful to avoid my actual eyebrow when I apply the strips because it would be very easy to accidentally wax off half of your eyebrow. I know it is difficult to see in the photo, but I do keep a small line of skin between my actual brow and where the wax is applied.
This is my brow after the trimming, plucking, and waxing. You can see some redness beneath my brow from the plucking, and this is why I can't really wax this area. For me, this skin is very delicate and I have injured it by trying to wax it before. Be cautious of waxing in this area, just to avoid tearing your skin.
Once I have finished the hair removal process, I apply the Azulene Finishing Oil that comes in the Sally Hansen kit. It is soothing to the skin and has a nice cooling sensation. Some may think that it stings, but for me it helps to cool any irritation left behind after waxing. The oil also helps to remove any waxy residue that may have been left behind. My redness typically fades pretty quickly, but I usually like to wax my brows before bed just so that my skin can settle without any make-up and so that the redness will be completely gone by the morning.
I hope that this was helpful to anyone looking to try at-home eyebrow grooming. It is very simple and once you have tried it a few times you will find a routine that works for you. I do not find that this method is painful, and any stinging does fade pretty quickly. This method has been working for me for a few years now, let me know if it works for you! :)