Wednesday, May 7, 2014

Painted My Nails!


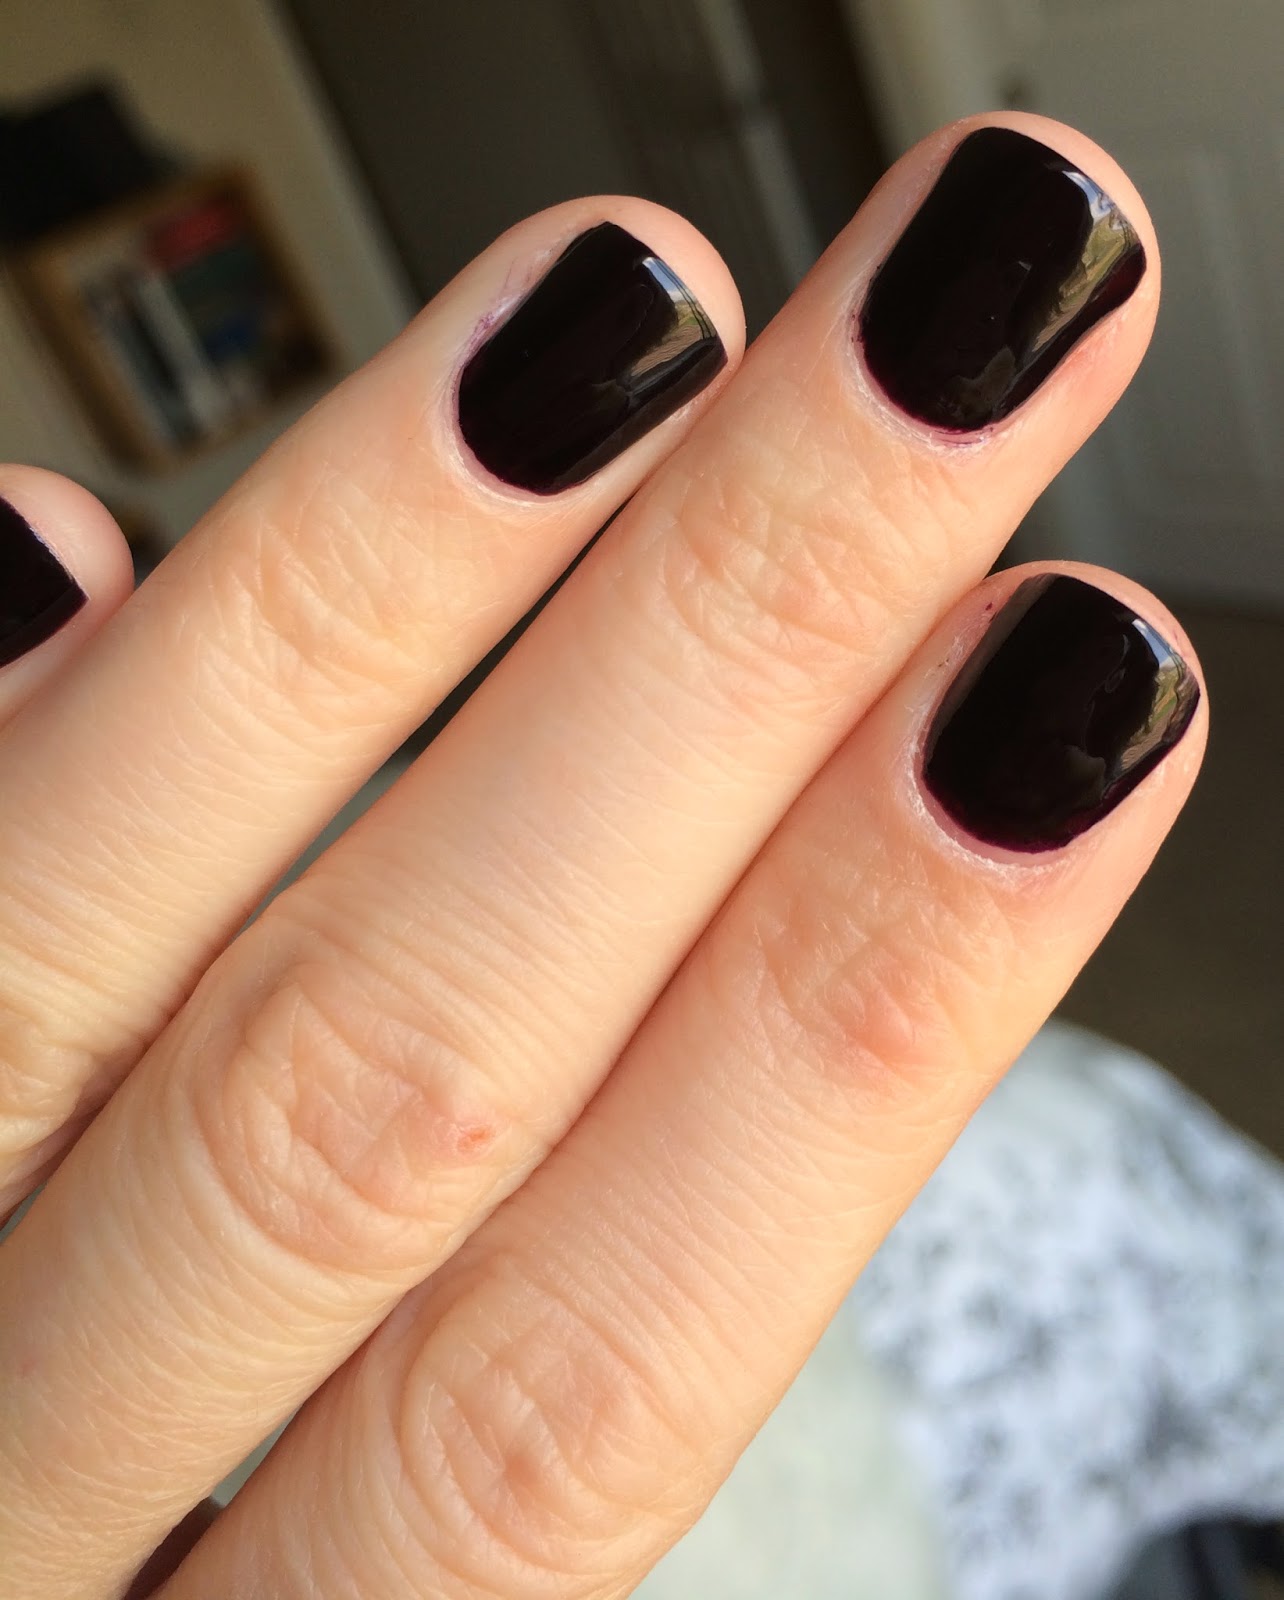
I do not typically paint my nails so I thought that I would show you!  My absolute favorite nail polish of all time is OPI Lincoln Park After Dark.  It is the most beautiful color and I always love the way that it looks on my nails.  It is an extremely dark purple, but on the nails it does look black unless you examine it closely.  I like this because I love super dark colors all year, but the slight purple of this shade really suits my skin tone better than a plain black.  I have repainted this on my toes about 5 times in a row.  It's the best!

Monday, May 5, 2014

One Eyeshadow Tutorial: Matte Black


I was definitely someone who used to be afraid to use super dark eyeshadows, especially the ones in the Urban Decay Naked palettes.  I have learned that these shades are actually very versatile and can be used in many different ways.  In this video I will show you how to use only a matte black eyeshadow to achieve a full smokey eye look from shadow to liner.

I hope you enjoy!  Let me know if you have a trick for using dark eyeshadow!

Friday, May 2, 2014

How I Fill My Eyebrows


To follow up from my post a few days ago about how I groom my eyebrows I thought that I would go over how I fill them in when I do my makeup.  I think that a well-done brow really defines the face, and for blondies like me, filling in light colored brows really makes a difference.  I do try to keep them light and natural because I'm so fair, but you can cater this process to meet your needs. 


This is what I start out with.  Not too bad, but definitely pretty fair in color and there are some sparse areas.


These are the tools that I will be using.  Any angled eyeshadow brush will work, as well as any spoolie brush.


This is the eyebrow kit that I use, it is the Milani Brow Fix Brow Kit in light.  As you can see I was using the middle shade which is called "Brow 1," but I have recently switched to "Brow 2" because I like the look better and I use less product.


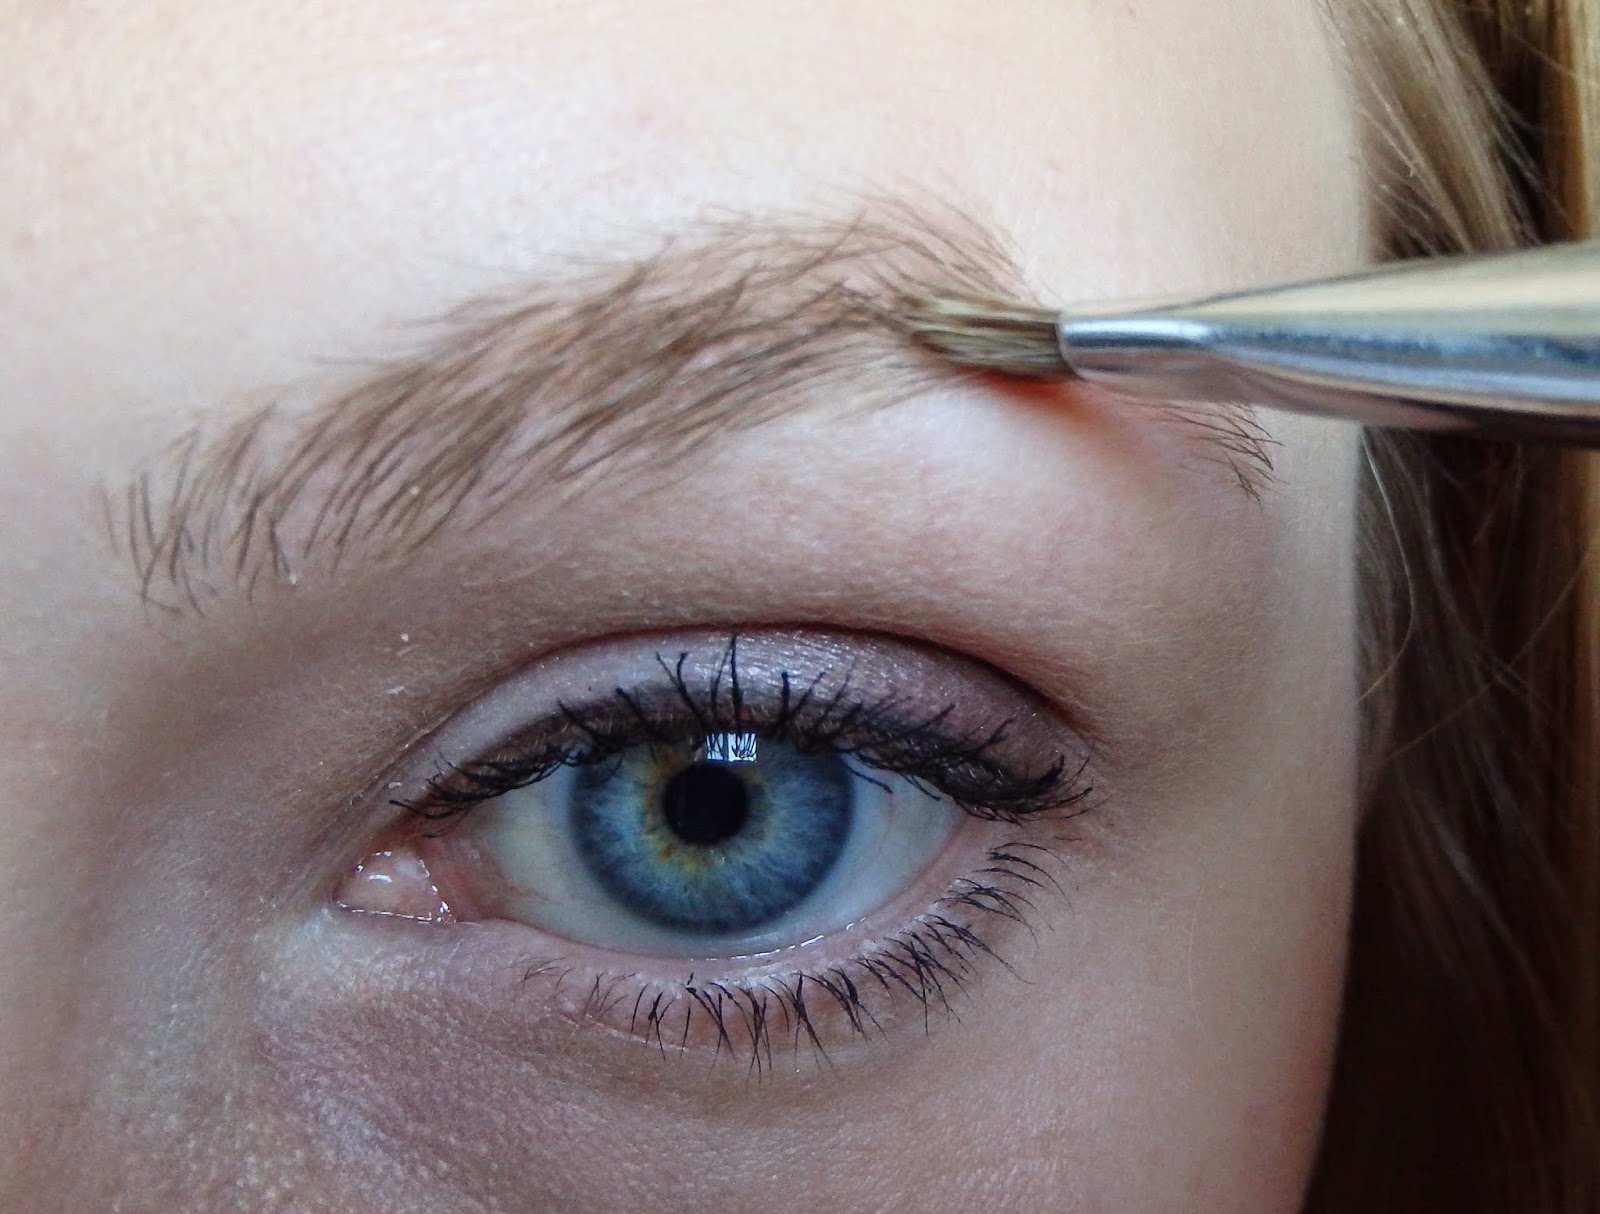
I dab the brush into the powder and start applying the product with short strokes into the middle of my brow where the natural arch is.  This is the part of my brow that I would like to define the most so this is where the product can be heavier.  I blend it out from there to fill the rest of my brow.  I just follow my natural shape.


After applying the powder I like to blend it in with the spoolie brush.  This just helps to make sure that the product has not built up in any particular section and helps to keep the look relatively soft and natural. 


I use a clear mascara to set my brows into place.  I use the Maybelline Great Lash Clear Mascara.  This works very well for my brows and they never feel crunchy or stiff.


I lightly distribute the mascara through my brows.


After applying the mascara I go back with the spoolie just to make sure that everything is in place and to prevent the mascara from building up and looking crunchy.


This is my finished look!  I have tried different products and methods and this one works the best for me.  As I said I really just try to keep it natural and soft but still defined.  Eyebrows can definitely make or break a look, and I really love the look of a strong brow. 

I hope you enjoyed!  Let me know if you have a method that works for you!


Sephora, Bath and Body Works, & Target Haul!


Because who doesn't like shopping?!?!  I picked up some random goodies and wanted to share them with you.  I hope you enjoy!  :)

Products mentioned:
Beauty Blender http://bit.ly/1kwqWjb
Benefit They're Real Mascara http://bit.ly/1uefgbx
BBW Hand Soap Provence Garden http://bit.ly/1uefz6k
BBW Hand Soap Wildberry Freesia http://bit.ly/ShIfNv
BBW Hand Soap Island White Pineapple http://bit.ly/RbXQwR
BBW Hand Soap Wild Poppies http://bit.ly/1krI5th
Method Pure Naked Moisturizing Body Wash (I couldn't find the exact scent online... sorry!) http://tgt.biz/1hkuEu8
St Ives Collagen Elastin Body Lotion http://tgt.biz/1krJ8t5
Boots Expert Sensitive Gentle Refreshing Toner http://tgt.biz/1hkv0kv
Conair Ceramic Wood Natural Shine Booster Round Brush http://tgt.biz/1nQt3Ug
Garnier Nourishing Cleansing Oil http://tgt.biz/1iLIKEr

Thursday, May 1, 2014

How I Maintain My Eyebrows


I have been pretty lucky in the eyebrow department, and have always managed to maintain them myself.  I have had them professionally done twice in my whole life, but only as a treat or as part of a gift package.  Luckily I do not have any horror stories about at-home eyebrow grooming, so I thought that I would share my method with you.  I do have a lot of blonde hair in my brows, which is definitely a blessing and a curse.  A blessing because a lot of the hair is very fine and nearly invisible, a curse because the fine little white blonde hairs are IMPOSSIBLE to pluck.  They are just so hard to see and nearly impossible to grasp with the tweezers.  Aside from that, I think that I have developed a pretty good system for keeping my brows in check.


This is how I start out.  I have a pretty good natural shape, I just like to clean up around the edges and trim the hairs to be shorter to keep them from becoming unruly.


I start with clean skin and I like to rub a small amount of toner over the area just to make sure that there is no oil or residue from my moisturizer.  The one I used is the Boots Expert Sensitive Gentle Refreshing Toner.


Next I like to use a spoolie brush to brush all of the hairs straight up.  This allows you to trim the hairs easily.  It may require a lot of brushing to move your eyebrows away from their natural path but this step is really necessary if you want to trim the excess length.


When it comes to the actual trimming, I use a set of cosmetic scissors that I received in a travel kit several years ago.  I never really used them for anything until one day I realized that they were perfect for my eyebrows.  Any small pair of scissors will work.  When you are actually cutting, make sure to go slowly and to take a step back and make sure that you are not cutting into your shape.  I like to just trim the hairs that stick up over the edge of the brow when combed up.


As you can see, trimming gives the brow a much more defined shape and will prevent them from becoming messy throughout the day.


After trimming I go in with my tweezers.  I don't like to tweeze too close to the actual brow, I just like to stick to the area below and right at the tail of my brows.  Again, make sure to take a step back every now and then to make sure that you aren't over-plucking.  Try to work on one brow at a time.  Obviously they should have the same basic shape, but each brow can be different and you may ruin your shape if you try too hard to make it match the other.


Next I like to take care of some of those pesky blonde hairs that I have.  These hairs are nearly invisible, however they can catch the light and makeup will cling to them, which can quickly ruin a look.  I like to use the Sally Hansen Wax Strip Kit.  It comes with pre-waxed strips that are perfect for my brows.  I have never tried them anywhere else on the body, so the box lasts for a very long time.  There are differently sized strips, but they can easily be cut down to the shape you want. 

You simply warm the strip between your hands and then peel it apart and apply to your skin.  Be sure to rub it in the direction of hair growth and then while keeping skin taut, quickly pull the strip off in the opposite direction.  I am able to use each side of the strip after I peel it apart.  These strips are very easy to use, and help me to remove the little blonde fuzzy hairs that I get around my brows to keep them looking clean and defined.


(I do have a natural dent in my brow shape near the arch on my left brow, which is shown here, and hair does not really grow there.  I typically fill this area in when I apply my makeup)

I use the strips between my brows, and then along the top edge and at the very end of my brow.  I am EXTREMELY careful to avoid my actual eyebrow when I apply the strips because it would be very easy to accidentally wax off half of your eyebrow.  I know it is difficult to see in the photo, but I do keep a small line of skin between my actual brow and where the wax is applied.


This is my brow after the trimming, plucking, and waxing.  You can see some redness beneath my brow from the plucking, and this is why I can't really wax this area.  For me, this skin is very delicate and I have injured it by trying to wax it before.  Be cautious of waxing in this area, just to avoid tearing your skin.


Once I have finished the hair removal process, I apply the Azulene Finishing Oil that comes in the Sally Hansen kit.  It is soothing to the skin and has a nice cooling sensation.  Some may think that it stings, but for me it helps to cool any irritation left behind after waxing.  The oil also helps to remove any waxy residue that may have been left behind.  My redness typically fades pretty quickly, but I usually like to wax my brows before bed just so that my skin can settle without any make-up and so that the redness will be completely gone by the morning.

I hope that this was helpful to anyone looking to try at-home eyebrow grooming.  It is very simple and once you have tried it a few times you will find a routine that works for you.  I do not find that this method is painful, and any stinging does fade pretty quickly.  This method has been working for me for a few years now, let me know if it works for you!  :)

Tuesday, April 29, 2014

April Favorites!


I know I have said it a million times but I really can't believe that April is ending.  This year is flying by so fast it is incredible!  This will be October Favorites before we know it... Crazy!  Anyway, I hope you enjoy the video, I had a pretty good assortment of favorites this month!

Products mentioned:

Clarisonic Luxe Brush Head http://bit.ly/1fu3BRV
Organix Thick and Full Biotin and Collagen Weightless Oil Spray http://tgt.biz/1mWSbWO
Nugg Revitalizing Face Mask http://tgt.biz/1hO6pbp
Sally Hansen Complete Salon Manicure in All Fired Up http://bit.ly/1rC2QWW
Orly Bonder Rubberized Base Coat http://bit.ly/1hO74tj
Westinghouse Wax Free Fragrance Disk in White Tea Mint: http://tgt.biz/1nDcWt9 (I also have Sugared Petal)
Seattle's Best Toasted Hazelnut K-Cups http://tgt.biz/1rKKYLo

Go watch Mad Men and Game of Thrones, and play 2048!

There will be a new blog post very soon!  Keep your eyes peeled!  (As creepy as that expression really is...)

Wednesday, April 23, 2014

Everyday Foundation Routine


I recorded my everyday foundation routine!  I do have fair skin and I try to keep my everyday look subtle and natural, but I still enjoy applying makeup.  This is the routine that I have been doing for a while now to achieve my everyday look.  I hope you enjoy!

Products mentioned:
Revlon Colorstay Foundation in 110 http://bit.ly/1iav2iT
Ulta Super Blender Sponge http://bit.ly/1tEjpW6
NYX Dark Circle Concealer in Fair http://bit.ly/1mFMij3
Urban Decay Eye Shadow in Foxy http://bit.ly/QG65Rr
Tarte Amazonian Clay Bronzer in Park Ave Princess http://bit.ly/PuOYBg
Tarte Amazonian Clay Blush in Exposed http://bit.ly/QG6nrK
MAC Studio Fix Powder foundation in NC20 http://bit.ly/1lGJfaG
Rimmel Stay Matte Pressed Powder http://bit.ly/1hlwDlh
Brushes www.sigmabeauty.com